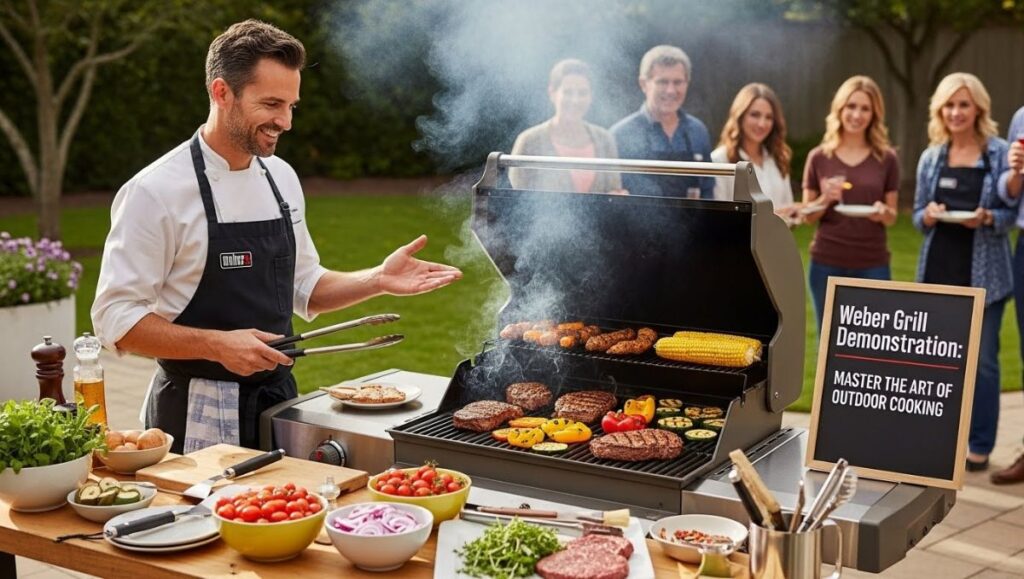
Summer is just around the corner, and that means it’s time to fire up the grill! If you’ve ever dreamt of mastering outdoor cooking, there’s no better companion than a Weber grill. Known for their quality craftsmanship and innovative designs, Weber grills have become synonymous with great barbecues and unforgettable gatherings. Whether you’re a seasoned grilling expert or a beginner looking to impress your friends at your next backyard barbecue, understanding the ins and outs of Weber grills can elevate your culinary game like never before. Get ready to dive into the world of smoky flavors, perfectly seared meats, and delightful grilled vegetables as we explore everything you need for an amazing Weber Grill demonstration!
The Different Types of Weber Grills and Their Features
Weber grills come in a variety of styles, each designed to cater to different cooking preferences. The classic kettle grill is iconic and versatile, perfect for charcoal enthusiasts who enjoy that smoky flavor.
For those who prefer gas grilling, the Genesis series offers powerful burners and ample cooking space. These models are equipped with features like side burners and integrated thermometers for precise temperature control.
If you’re looking for convenience, consider the Spirit line. It’s compact yet efficient—ideal for smaller patios or balconies without sacrificing quality.
For true barbecue aficionados, the Summit series provides top-tier performance with advanced features such as rotisserie kits and smoke boxes.
Weber’s portable grills are great for tailgating or camping trips where mobility is key while still delivering on taste. Each type ensures a unique outdoor cooking experience tailored to your needs.
The Benefits of Using a Weber Grill for Outdoor Cooking
Weber grills are synonymous with quality and durability, making them a top choice for outdoor cooking enthusiasts. Their efficient heat distribution ensures that food cooks evenly, preventing those frustrating hot spots.
Versatility is another strong point. Whether you’re searing steaks or slow-roasting a rack of ribs, Weber’s designs accommodate various cooking techniques. Many models even come equipped with side burners and rotisserie attachments to expand your culinary possibilities.
The ease of use also stands out. With intuitive controls and quick-start ignition systems, you can fire up your grill effortlessly—perfect for spontaneous gatherings or planned barbecues alike.
Moreover, Weber’s commitment to innovation means their grills often feature advancements like flavorizer bars and easy-clean grease management systems. These elements not only enhance flavors but also simplify cleanup after grilling sessions.
Essential Tools and Accessories for a Successful Grill Demonstration
Having the right tools is crucial for a successful Weber grill demonstration. Start with a quality set of grilling utensils, including tongs, spatulas, and long-handled forks. These will keep your hands safe from heat while allowing you to flip and serve perfectly cooked food.
A reliable meat thermometer is essential for achieving that ideal doneness. With it, you can avoid undercooked or overcooked meals, impressing your guests every time.
Don’t forget about grill brushes for cleaning grates before and after use. A clean surface ensures better flavor and prevents sticking.
Consider investing in a good grilling apron too; it keeps stains at bay while providing pockets for easy access to tools.
Having aluminum foil on hand can help create perfect packets for veggies or delicate fish fillets – just one more way to elevate your outdoor cooking game!
Preparing and Seasoning Your Grill Before Use
Before firing up your Weber grill, preparation is key. Start by cleaning the grates with a brush to remove any residue from previous cooking sessions. A clean surface ensures even heating and prevents sticking.
Next, it’s time to season your grill. Coat the grates lightly with high-smoke-point oil, such as canola or grapeseed oil. This not only helps create a non-stick surface but also adds flavor to your food.
Don’t forget about checking fuel levels if you’re using gas or charcoal. Ensure you have enough fuel for your grilling session so that you won’t run out mid-cook.
If you’re working with charcoal, consider creating two zones for direct and indirect heat. Arranging coals on one side allows for versatile cooking options while keeping some space cooler for slower roasting.
With everything set up and seasoned properly, you’re ready to unleash deliciousness on the grill!
Step-by-Step Guide to Grilling on a Weber Grill
Start by preheating your Weber grill. This step is crucial for achieving that perfect sear. Set it to medium-high heat and let it warm up for about 10-15 minutes.
While the grill heats, prepare your ingredients. Cut meats into even portions, ensuring they cook uniformly. Season them generously with salt, pepper, or your favorite marinade.
Once it’s hot enough, oil the grates lightly to prevent sticking. Place the food on the grill at a 45-degree angle for those beautiful crosshatch marks.
Monitor cooking times carefully based on thickness and type of meat. Use a meat thermometer to check doneness without cutting into it.
Remember to flip your items only once or twice; this helps lock in juices while developing flavor. After grilling, let everything rest before serving—this allows flavors to meld beautifully together!
Tips and Tricks for Perfectly Grilled Foods
Choose the right temperature. Preheating your Weber grill is key. This helps to achieve those beautiful sear marks while sealing in flavors.
Don’t overcrowd the grill. Give each piece enough space for even cooking and proper airflow. Crowding leads to steaming instead of grilling.
Use a meat thermometer. It takes the guesswork out of achieving perfect doneness, ensuring your meats are both safe and succulent.
Let it rest! After grilling, allow your food to rest for several minutes before serving. This redistributes juices for maximum flavor and tenderness.
Experiment with wood chips or herbs for added smokiness. A handful of soaked wood chips can elevate any dish, imparting unique tastes you won’t forget.
Keep a spray bottle handy filled with water or apple cider vinegar to control flare-ups without losing moisture in your food’s surface during grilling sessions.
Serving Suggestions and Recipe Ideas for Your Next Grill Demonstration
When it comes to a Weber grill demonstration, the food you serve can elevate the entire experience. Start with classic burgers and hot dogs—they’re quick, easy, and always popular. For something a bit different, consider skewering marinated vegetables alongside chicken or shrimp for colorful kabobs. These not only look great but also pack in flavor.
Vegetarian options are essential too. Grilled portobello mushrooms make an excellent meat substitute while capturing that smoky essence everyone loves. Toss in some grilled corn on the cob seasoned with lime and chili powder to add zest to your menu.
Don’t forget about dessert! Grilling fruits like pineapple or peaches brings out their natural sweetness and adds a unique twist. Serve them with a scoop of vanilla ice cream for a delightful finish.
Pair your grilled masterpieces with refreshing dips like guacamole or tzatziki sauce to enhance flavors even more. A well-chosen beverage selection—from craft beers to fruity cocktails—can perfectly complement the meal.
With these serving suggestions and recipe ideas at hand, you’re all set for an engaging Weber grill demonstration that will impress family and friends alike. Enjoying good food together is what outdoor cooking is all about!