When it comes to home security camera, getting the video images you need isn’t just about resolution or brand names. It’s about light. The camera can deliver a cinematic look during dusk, and an unwatchable one at midnight, all because of the lighting. A decade of setting up and testing outdoor and indoor setups for friends, family members and clients has taught me that smart lighting decisions often lead to bigger wins than purchasing a more expensive camera. This guide explains how to use light not simply for illumination, but for clarity, color and identification so your recorded video comes in useful when it needs to.
Why the Lighting Matters More Than You Think
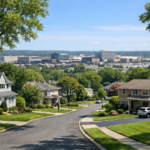
Security incidents seldom time themselves to occur on sunny afternoons. Most take place in mixed or low light porches at twilight, driveways under a streetlamp, side yards with dappled shadows. Home security cameras only work when there’s light to show detail. Decent illumination reveals faces, clothing and license plates. Bad lighting is just plainly conceived of as: blur, banding and unusable outlines.
Think of lighting as a bargain-basement performance upgrade that carries across to every camera you possess.
Know the Light Tools Already in Your Camera
Infrared Night Vision and When to Usecul8z It
Nearly all home security cameras employ infrared LEDs for black-and-white night vision. IR is robust and power efficient, but it flattens textures and can blow out close objects like reflective jackets or number plates. If things look ghostly, then lower the camera angle and remove any shiny surfaces from around the camera. Keep spiders at bay with a dot of peppermint oil on the housing; webs are IR reflective and ruin clarity.
Color Night Vision and Low-Light Ambient Light
Here are 12 easy upgrades to consider getting now that the days are longer and warmer. The challenge is delivering uniform, soft illumination without hot spots. Keep a steady level of light on the camera after sunset if your camera has color night vision, so its sensor isn’t frequently switching between color and infrared. That always-on mode should eliminate focus hunting, not to mention jerky exposure jumps.
WDR / HDR for High-Contrast Scenes
Even good sensors can be fooled by backlit entries and bright driveways. Wide Dynamic Range (WDR) or HDR allows your camera to balance very dark and very bright areas within the same frame. If your doorbell recording turns faces into silhouettes, turn on WDR and nix any bare-bulb glare within the camera’s field. In my experience, WDR is something you’ll want to enable for porches, garages, and windows that look toward the sunrise or sunset.
Get the Color Temperature Right
Light color affects how natural your video looks. Warmth (about 2700K) is flattering to skin tones and welcoming at entrances. Cool white (4000 to 5000 K) is brighter to the eye and improves detail in a driveway and side yard. Mixing wildly disparate color temperatures in one scene can trip up automatic white balance and result in weird skin tones or greenish concrete.
Choose a temperature per area, and be consistent among fixtures within the same camera view.
Brightness Without Blowouts
The Goldilocks Rule for Lumens
Too dim and you lose detail. More glaringly reflective surfaces bloom into white globs. A discreet, diffused 500–800 lumen fixture can often work better for small porches and vestibules than a naked 1500-lumen spotlight in your camera’s field of view. For wide driveways, increase output but disburse it across multiple gentler lights, not a single blinding beam.
Lighting opens up features and keeps you from getting strong shadows, plus having steadier exposure is better for your camera.
Diffusion and Shielding
Frosted lenses, down-facing shades and wall-wash fixtures distribute light more broadly and help minimize glare. Clarity’s enemy, glare, amplifies exposure everywhere in the frame and smothers shadow detail. If your camera is pointed near a table lamp, you can employ a shield or tilt the fixture so that the light bulb itself never makes an appearance on screen.
Position Lights and Cameras to Complement Each Other
Cross-Lighting for Faces
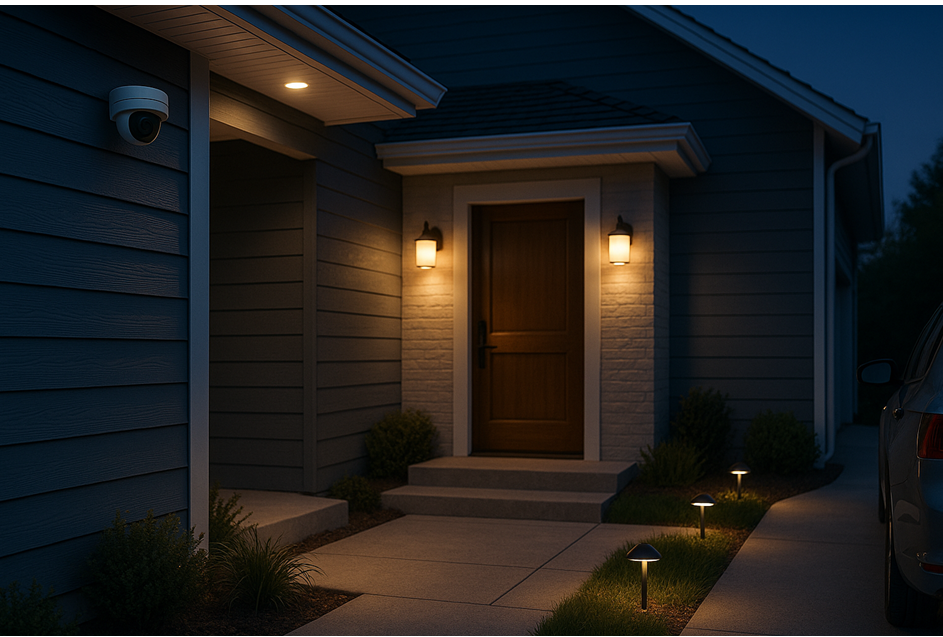
Mount lights off-axis to your home security cameras, so you’re lighting the subject and not the lens. Cross-lighting at 30 to 60 degrees from the camera shows natural features and reduces red-eye or reflective washout. For a front door, this means sconces on the hinge side of the door and the camera placed on the other (latch) side will generally achieve great detail without throwing shadows across faces.
Height and Angle Adjustments
Camera too high? You will capture hats and hoodies, not faces. Camera too low? The risk of IR blowback and theft rises. I shoot for 7 to 9 feet outside and just above eye level indoors. Then lean just a bit, catching from mid-torso to face at the normal range. Mount lights high enough you won’t get glare in the lens but low enough to light faces under caps and hoodie brims.
Motion-Activated vs Always-On
Motion lights conserve energy and startle intruders but can also produce exposure swings and splotchy short clips that lack context. For entrances, I prefer a low-brightness always-on baseline augmented by motion-activated boost lighting. When someone is near, the boost triggers to reveal texture and identifiers as the camera continues recording the details cleanly color night vision stays on.
In backyards where wildlife is constantly triggering notifications, narrow your motion zones and lengthen your cooldowns to cut down on strobe-like activity.
Minimize Noise and Blur in Night Photography
Low light makes your camera do two other things: add more ISO and slow the shutter. Grain here is high ISO; blur is a slow shutter. You can fix both with more light.
If your camera gives you the option of “shutter priority,” avoid opening it way up at entrances where people move quickly. Improved lighting enables the camera to select faster shutter speeds and lower ISO, resulting in sharper frames and cleaner motion.
Avoid Common Lighting Mistakes
- Shiny house numbers by the lens can blow out and confuse autofocus.
- Plastic domes over lights become opaque; clean them once every few months.
- Don’t aim cameras directly at traffic or reflective water that will send exposure up and nearby faces into shadow.
- Standardize on a consistent type of bulb; disparate replacements will cause color flicker, which is barely visible to the human eye but looks chaotic to sensors.
Floodlights, Spotlights, and Integrated Camera Lighting
Floodlights cover large areas evenly. They can cause high-contrast drama in very dark scenes, which may hide facial detail in shadows. If you’re working with a spotlight camera, position a softer fill light on the opposite side to eliminate shadows without erasing details.
Floodlight cameras are handy, but if the fixture must stay in place for a good shot, use diffusion and shoot with the camera slightly off-angle to avoid lens flare.
Indoor Hallways, Living Rooms and Garages
Indoor lighting is more forgiving but still a challenge.
- Hallways: Keep even light so you don’t cast a “tunnel” silhouette.
- Living rooms: Table lamps behind your camera serve as soft fill that provides a natural look to faces.
- Garages: Cool white overheads help in reading plates and tool labels.
Close blinds at night; even streetlights and passing headlights can result in pulsing exposures that trash clips.
Seasonal and Smart Controls
Sun angles change with seasons. Something that seems ideal in October could backlight your entire porch in June. Revisit angles every quarter and tweak schedules.
Smart switches and scenes help. Program a “Security Evening” scene that, at sunset, turns on porch and driveway lights for a few hours but keeps them dim after dark. If you run solar pathway lights, check they don’t flicker; some cheap drivers can create visible banding on video.
Simple Upgrades That Pay Off
- Swap in dimmable, high-CRI LEDs in place of harsh bulbs for truer colors.
- Add a second low-wattage fixture to fill shadows rather than making one bulb brighter.
- Use fixtures and junction boxes rated for outdoor use to avoid moisture degrading connections or fogging lenses.
- A $20 dimmer or a $40 side-yard sconce can improve camera output more than a sensor spec bump ever could.
Testing: You’ll Want to Skip This Step
Record test clips at night, dawn and rain. Go back and talk to the camera with cap on and off. Compare the footage as viewed on your phone and through a larger screen. Search for usable detail: eyes, facial hair, logos and shoe color as well as anything that can help make out the legibility of the plate.
Do this one angle, dimming level or fixture position at a time and try again. This is how you spin “meh” into “we see so clearly.”
Troubleshooting Quick Wins
“A lot of people’s night stuff is a little soft,” he said, recommending that filmmakers decrease lens flare by adjusting or blocking nearby lights. If faces are too dark, add a side fill at low brightness rather than turning up the porch light to be three stops over.
If cameras flip flop between color and IR, go up 1–2 clicks on the baseline IR illumination or lock it in if possible, depending on your model camera. If insects are attracted to your IR LEDs, install a nearby warm light that will draw them away from the lens.
Safety and Etiquette
- Projectors should illuminate only as far as needed; avoid beaming into neighbors’ windows.
- Aim fixtures to make the most of your property features like shrubs and trees.
- Use shields and downward angles.
- Do not house fixtures near gutters or sprinkler spray.
- Check local ordinances before installing high-power floodlights pointing toward public streets.
Effective lighting should make everyone feel safer, not irritated.
Final Take: Light Now, Upgrades Later
If you want to upgrade home security cameras, it’s not a new camera you need. It’s better lighting. Balanced color temperature, even light distribution and no hard light in the middle, with a steady baseline and motion boosts where they make sense, will make a huge difference. Begin with one entry, try it out, and then use what works across all of your property.
Frequently Asked Questions
How strong should my porch light be to get clear video at the door?
For most doorways, a soft 500–800 lumen warm-white light generates natural skin tones and plenty of detail to identify faces but will not wash them out. If you have a big or very dark porch, add a second low-wattage fill instead of swapping one bulb for something blinding.
Am I able to keep color night vision on all night?
Yes, if you give it a consistent baseline of ambient light. That dim, always-on porch or soffit light can help cameras stay in color mode and avoid noisy switching. Prevent glare from entering the lens and diffuse light for a balanced spread.
Why do license plates get blown out at night?
Plates will reflect IR and strong white light back into the lens. Skew the camera a little off-axis, reduce that hotspot and add some gentler cross-light. It is also easier to preserve characters with faster shutter speeds made possible by better lighting.
Warm or cool bulbs for outdoor security lights?
Use warm white around doorways for natural skin tones and a welcoming effect. Use cool white in driveways or work areas where crisp detail is more important. Maintain the same temperature within each camera’s scene to prevent white-balance shifts.
Should I use floodlight cameras instead of separate lights and cameras?
They’re practical and with the right diffusion and angle can look great. Individual fixtures allow more freedom to position and aim lights out of neighbors’ eyes. If you use an integrated floodlight camera, move the camera off center and add a soft fill on the opposite side for balanced exposure.
Smart Light: Do I need smart lights to make my video better?
Smart lights help but aren’t required. Smart dimmers and schedules can keep a steady baseline overnight and ramp up when motion is detected. Even simple, well-placed non-smart lights can greatly improve camera performance when properly diffused and positioned.